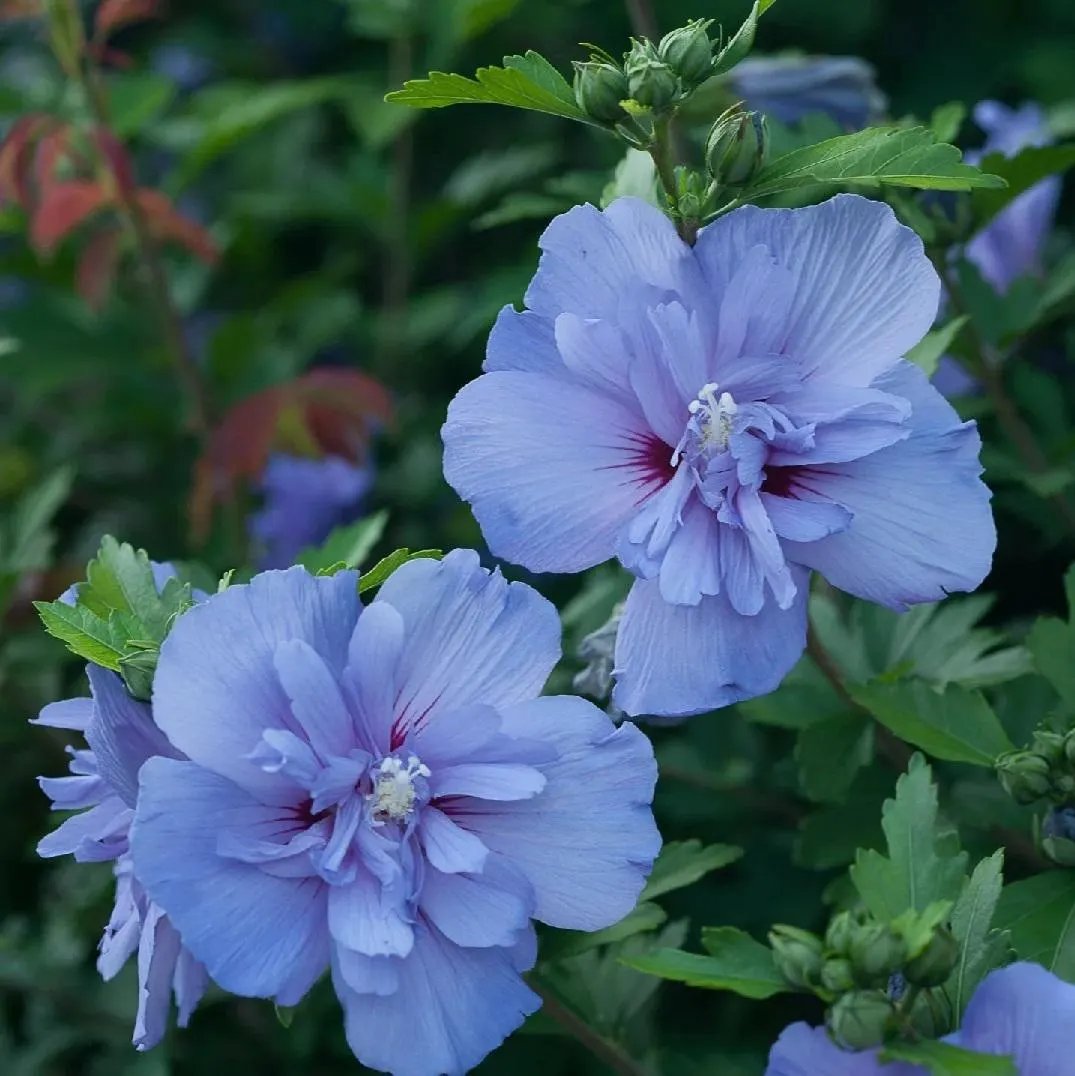
The Blue Chiffon Hibiscus (Hibiscus syriacus ‘Blue Chiffon’) is a stunning, deciduous shrub known for its large, ruffled, blue-violet flowers with a delicate lacy center. As part of the Rose of Sharon family, this hardy hibiscus variety is prized for its long bloom season, resilience, and ability to attract pollinators like butterflies and hummingbirds. Proper care ensures that this shrub thrives, producing abundant blossoms throughout the summer and into early fall.
This guide provides a detailed breakdown of how to plant, grow, and maintain the Blue Chiffon Hibiscus for a healthy and flourishing display year after year.
1. Understanding Blue Chiffon Hibiscus
Characteristics
- Botanical Name: Hibiscus syriacus ‘Blue Chiffon’
- Common Name: Blue Chiffon Hibiscus, Rose of Sharon
- Plant Type: Deciduous shrub
- Growth Habit: Upright, vase-shaped
- Height & Spread: 8-12 feet tall, 4-6 feet wide
- Foliage: Medium green, serrated leaves
- Bloom Time: Mid-summer to early fall
- Flowers: Blue-violet, semi-double, 3-4 inches in diameter
- Lifespan: Can live for decades with proper care
2. Ideal Growing Conditions
Light Requirements
- Prefers full sun (6-8 hours of direct sunlight daily).
- Can tolerate partial shade, but flowering may be reduced.
- More sun exposure leads to stronger stems and vibrant blooms.
Temperature & Hardiness
- Thrives in USDA zones 5-9.
- Tolerates hot summers and humidity, making it ideal for warmer climates.
- Can withstand cold winters, though mulch helps protect roots in extreme conditions.
Soil Preferences
- Requires well-draining soil; prefers loamy or sandy textures.
- Tolerates a variety of soils but thrives in moderately fertile, slightly acidic to neutral soil (pH 6.0-7.5).
- Avoid heavy clay soil that retains excessive moisture, leading to root rot.
3. Planting & Spacing
Best Time to Plant
- Spring or early fall is ideal to establish strong roots before summer heat or winter cold.
Planting Instructions
- Choose a sunny location with well-draining soil.
- Dig a hole twice the width and equal in depth to the root ball.
- Loosen the roots of the plant before placing it in the hole.
- Backfill with native soil, mixing in compost if necessary for fertility.
- Water deeply after planting to remove air pockets.
- Mulch around the base to retain moisture and suppress weeds.
Spacing
- Space plants 4-6 feet apart to allow proper air circulation and growth.
- If planting as a hedge, space closer (3-4 feet) for a denser look.
4. Watering Requirements
How Often to Water
- Water deeply once a week, ensuring moisture reaches the roots.
- Increase frequency in hot, dry periods (2-3 times per week if necessary).
- Reduce watering in cooler months but do not allow the soil to dry out completely.
Signs of Overwatering & Underwatering
- Overwatering:
- Yellowing leaves
- Wilting despite wet soil
- Root rot
- Underwatering:
- Dry, brittle leaves
- Drooping foliage that perks up after watering
- Fewer blooms
5. Fertilization Needs
- Apply a balanced fertilizer (10-10-10 or 12-6-6) in early spring when new growth appears.
- A second application mid-summer promotes prolonged blooming.
- Use a slow-release fertilizer or organic compost to improve soil nutrients.
- Avoid over-fertilizing, which encourages excessive leafy growth at the expense of flowers.
6. Pruning & Maintenance
Pruning
- Best time to prune is late winter or early spring, before new growth starts.
- Remove dead, weak, or crossing branches to improve airflow and shape.
- Can be pruned hard to control size or lightly for shaping.
- Deadhead spent blooms if desired, though not necessary.
Winter Care
- Apply 2-3 inches of mulch around the base to protect roots in colder zones.
- Avoid pruning in late fall, as this can encourage new growth that may be damaged by frost.
7. Propagation Methods
By Softwood Cuttings (Best in late spring to early summer)
- Cut a 4-6 inch piece of soft, green stem.
- Remove lower leaves and dip the cut end in rooting hormone.
- Plant in well-draining soil and keep moist until rooted (4-6 weeks).
By Seeds
- Collect mature seeds in fall.
- Cold stratify seeds for 4-6 weeks before planting in spring.
- Sow in moist soil and keep in a warm, sunny location.
8. Common Pests & Diseases
Pests
- Aphids – Spray with water or neem oil.
- Japanese Beetles – Handpick or use floating row covers.
- Spider Mites – Increase humidity and rinse with water.
Diseases
- Powdery Mildew – Improve air circulation and apply a fungicide.
- Root Rot – Ensure proper drainage and avoid overwatering.
- Leaf Spot – Remove infected leaves and apply copper-based fungicides.
9. Landscape & Companion Planting
Ideal Uses
- Borders and hedges
- Pollinator gardens
- Specimen plants
- Mixed shrub beds
Companion Plants
- Lavender – Complements the blue tones of hibiscus.
- Salvia – Attracts pollinators and has similar growth habits.
- Roses – Provides a layered floral display.
- Coneflowers – Adds contrasting flower shapes and colors.
10. Frequently Asked Questions
Q: Why isn’t my Blue Chiffon Hibiscus blooming?
- Could be due to insufficient sunlight, excess nitrogen, or improper pruning.
Q: Is Blue Chiffon Hibiscus invasive?
- It can self-seed, but is generally not invasive when managed properly.
Q: Can it grow in pots?
- Yes! Use a large container with drainage holes and ensure regular watering.
Q: How do I make blooms more vibrant?
- Provide full sun, proper fertilization, and occasional deadheading.
Conclusion
The Blue Chiffon Hibiscus is a hardy, show-stopping shrub that requires minimal maintenance for maximum reward. With its extended bloom time, pollinator-friendly nature, and adaptability to various climates, it’s an excellent addition to any garden. By providing full sun, well-draining soil, moderate watering, and seasonal pruning, your Blue Chiffon Hibiscus will thrive for years to come.