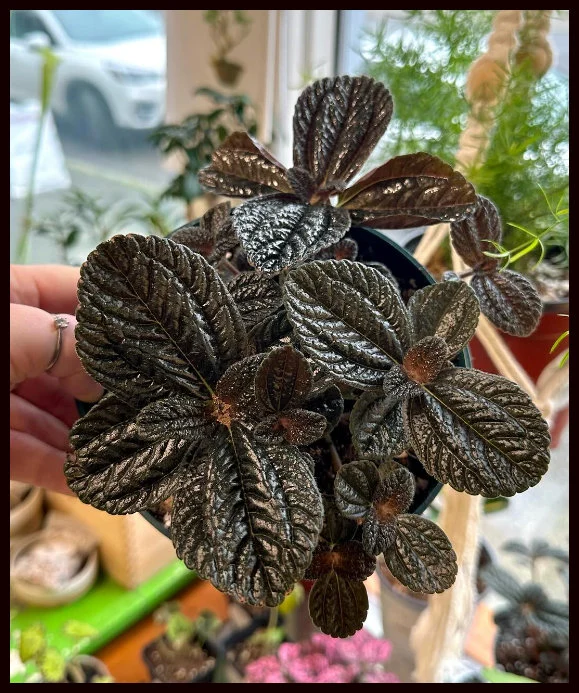
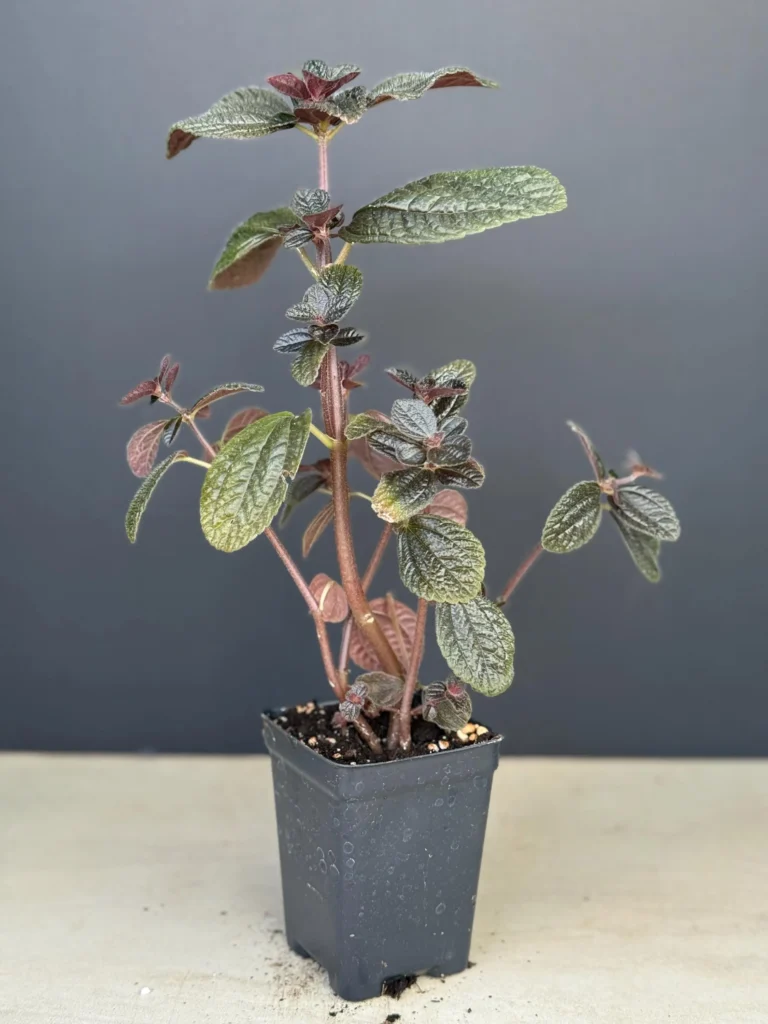
The Chocolate Pilea (Pilea involucrata) is a stunning, low-maintenance plant that can make an impressive addition to any indoor garden. Known for its unique, chocolate-brown foliage with a textured pattern, it is often referred to as the Creeping Charlie or Friendship Plant. With its attractive leaves and easy-to-care-for nature, this plant is perfect for both beginner and experienced plant enthusiasts.
In this care guide, we will cover all the essential aspects of keeping your Chocolate Pilea healthy and thriving, including light requirements, watering needs, soil type, temperature, humidity, fertilizing, propagation, and pest control.
1. Light Requirements
Light is one of the most important factors when it comes to keeping your Chocolate Pilea happy. The plant thrives in bright, indirect light. Too much direct sunlight can cause the leaves to burn, leading to brown spots or faded coloration. Too little light, on the other hand, can lead to slow growth and fewer leaves.
Optimal Light:
- Bright, indirect light is ideal. A spot near an east- or west-facing window works best.
- If you don’t have access to natural light, you can use grow lights to supplement the lack of sunlight.
- Avoid direct sunlight, especially in the afternoon when it can be the most intense.
If your plant’s leaves start to yellow or become leggy, it could be a sign that it’s not getting enough light. If you notice leaf burn or fading colors, it might be getting too much direct sun.
2. Watering Needs
Chocolate Pilea prefers to be kept evenly moist, but it does not tolerate sitting in waterlogged soil. Overwatering or underwatering can both be harmful to the plant. Let’s break down how to manage watering:
Watering Schedule:
- Water when the top inch or two of soil feels dry to the touch.
- In the growing season (spring and summer), you may need to water more often, about once a week.
- During the dormant season (fall and winter), reduce watering frequency, but ensure that the soil doesn’t dry out completely.
Watering Technique:
- Ensure proper drainage in your pot to prevent root rot. Choose a pot with drainage holes at the bottom.
- Water thoroughly, but allow excess water to drain away. Never let the plant sit in standing water.
- If you’re unsure, it’s better to under-water slightly than to overwater. Chocolate Pilea is more forgiving of dryness than excess moisture.
If you’re seeing yellowing leaves or leaf drop, this could indicate that you are overwatering or that the plant’s roots are sitting in too much water. On the other hand, crispy leaf edges might be a sign of underwatering.
3. Soil Requirements
Pilea involucrata requires well-draining soil to thrive. It doesn’t like to sit in water, and poor drainage can lead to root rot. A mix designed for houseplants or a general-purpose potting mix with added perlite or sand for drainage works well.
Ideal Soil Mix:
- Peat-based potting soil: This helps retain moisture without becoming soggy.
- Perlite or coarse sand: These help with drainage and prevent the soil from becoming compacted.
- A good ratio is two parts potting soil to one part perlite or sand.
If you prefer, you can use a cactus or succulent mix, which often has better drainage.
4. Temperature and Humidity
Chocolate Pilea thrives in moderate to warm temperatures, making it a perfect indoor plant for most homes. The plant does best at temperatures between 65-75°F (18-24°C). It is important to avoid extreme cold or drafts, as this can damage the plant and stunt its growth.
Temperature Care:
- Keep your Pilea in a warm environment, but avoid placing it near heaters or radiators, as the air can become too dry and hot.
- If your home tends to get cold, keep the plant away from cold windows or air conditioning units.
Humidity: Chocolate Pilea enjoys moderate to high humidity. It will thrive in a humidity level between 40-60%. If the air in your home is too dry, especially in winter, you can boost the humidity around your plant by:
- Using a humidifier in the room.
- Placing the plant on a pebble tray filled with water. The evaporating water will create a more humid environment around the plant.
- Grouping it with other plants to create a mini humid microclimate.
If the humidity is too low, you may notice the leaves curling, turning crispy, or browning at the edges.
5. Fertilizing
Pilea involucrata is not a heavy feeder, but it will benefit from regular fertilization during the growing season (spring and summer). In the winter months, you can cut back on fertilizing since the plant is not actively growing.
Fertilizing Tips:
- Use a balanced, water-soluble fertilizer diluted to half-strength. Apply every 4-6 weeks during the growing season.
- Organic fertilizers or liquid houseplant fertilizers work well.
- Avoid over-fertilizing, as this can lead to nutrient burn and harm the plant. If you notice brown tips or edges after fertilizing, reduce the amount or frequency of fertilizer.
6. Pruning and Maintenance
The Chocolate Pilea is relatively low-maintenance and doesn’t require much pruning. However, occasional pruning will help maintain its shape and encourage new growth. Remove any dead or damaged leaves to improve the plant’s overall appearance.
How to Prune:
- Trim back leggy growth to encourage a bushier shape.
- You can cut back long stems to just above a leaf node to encourage branching.
- Regularly remove yellowing or dried leaves to keep the plant healthy.
7. Propagation
Chocolate Pilea is easy to propagate through stem cuttings. This is a great way to increase your plant collection or share with friends. Here’s a simple guide to propagate:
Propagation Steps:
- Select a healthy stem with a few leaves and cut it just below a leaf node (where the leaf attaches to the stem).
- Remove the lower leaves to expose the stem.
- Place the cutting in a small glass of water or plant it directly in soil.
- If rooting in water, change the water every few days. If rooting in soil, keep the soil lightly moist.
- After a few weeks, the cutting should develop roots. Once it has a solid root system, it can be potted in a regular-sized pot.
Propagation is a fun and rewarding way to grow more Chocolate Pileas or share this beautiful plant with others.
8. Common Problems and Troubleshooting
Though relatively easy to care for, Chocolate Pilea can experience a few issues. Below are some common problems and how to resolve them:
Yellow Leaves:
- This can be caused by overwatering, underwatering, or low light.
- Check the soil moisture and adjust your watering schedule accordingly.
- Ensure the plant is getting enough light but is not exposed to direct sunlight.
Brown Leaf Tips:
- Brown tips can be a sign of low humidity or over-fertilization.
- Increase the humidity around the plant and reduce the frequency of fertilization.
Leggy Growth:
- Leggy growth usually means the plant is not getting enough light.
- Move the plant to a brighter location.
Pests:
- Mealybugs, spider mites, and aphids can sometimes infest Chocolate Pilea.
- Treat the plant with insecticidal soap or neem oil and regularly inspect the leaves for pests.
Conclusion
The Chocolate Pilea is a striking and relatively low-maintenance houseplant that can thrive with a little care. By providing the right light, water, and soil, as well as monitoring humidity and temperature, you can enjoy its stunning foliage for years to come. Whether you’re a beginner or a seasoned plant lover, this delightful plant will make a beautiful and rewarding addition to your collection.
With the tips and advice above, you’ll be well on your way to growing a healthy, thriving Chocolate Pilea that will continue to impress and delight. Happy gardening!


Proudly powered by WordPress